Editable PPT decks are a powerful learning resource for instructors. They are decks where instructors can edit/customize labeled or unlabeled images and provide step-out figures across multiple slides. With the increased popularity and online teaching, universities are requesting editable PPT decks be accessible.
These decks come in 3 different versions:

Label-edit
Unlabeled
Step-edit
Guidelines to Create Accessible Editable Decks
- Use the Pearson accessible template.
- Do not add text boxes located in the ribbon under the Insert tab. These are not fully accessible.
- Placeholder boxes are accessible and should be used. They are located in the Master Slide view.
In the ribbon, go to the View tab and select Slide Master.
Tips:- Plan out how many content boxes you will need and in what order (how they will visually appear on the slide)
- In the ribbon, under Slide Master select Insert Placeholder.
- Note: as you insert Placeholder boxes, keep in mind, Microsoft automatically assigns these boxes to the reading order as you add them to the slide. Thinking through your slide design and inserting boxes in the correct order, will save you a lot of time on the backend.
- Try to keep overlapping boxes to a minimum; however, due to the nature of these types of decks, overlapping will occur and is acceptable.
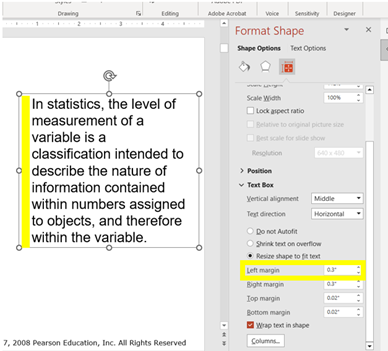
- Delete any padding around the text, if applicable. This will decrease the placeholder box footprint so you can position boxes closer together without overlapping them.
Select the box, right-click, and select Size and Position. Under Text Box, adjust margins to 0.
- Text Font and Size
- Use fonts: Arial, Calibri, or Verdana
- Minimum text size should be 12 pt.
- Slide title font size may be 12 pt., black, and positioned at the top, left of each slide.
- Ensure Reading order
- Make sure the reading order is correct. To test, start at the title slide box and begin tabbing through all the objects on the slide. This is your reading order. Ensure tab focus is on the intended order. This is how screen readers will announce the slide content. See Reading Order, if you need to manually fix.
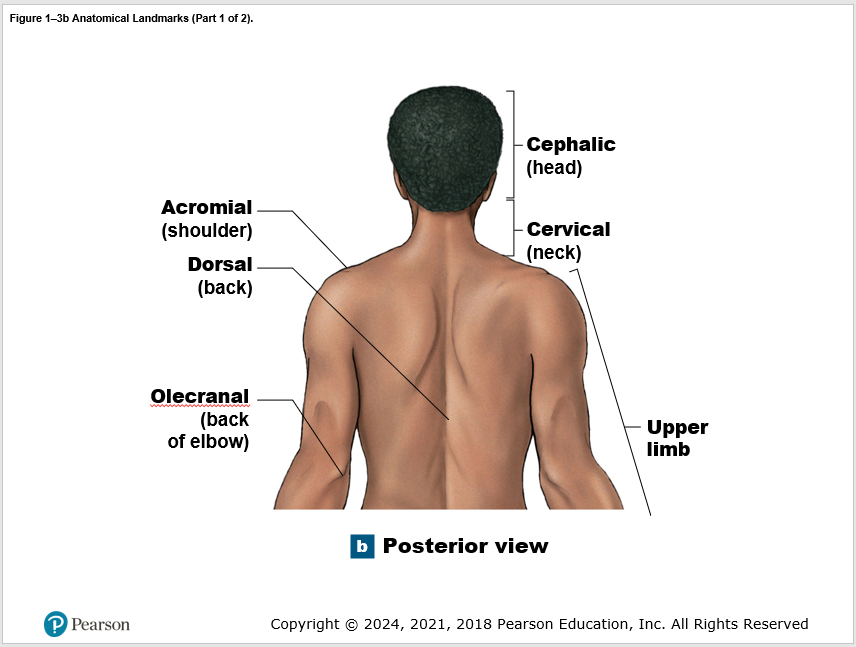
- If your slide has a main image with leader lines and content placeholder boxes around it, most times for a good user experience, consider this reading order:
- Slide title
- Main image with alt text
- Placeholder box (label)
- Corresponding leader line (provide alt text for the leader line. Alt text should describe where it is pointing to)
- And so on . . .
- Reading order should go from top to bottom, left to right
- Add alt text for leader lines or arrows
- If the arrow or leader line is pointing to a position, the alt text should describe where it is pointing to.
- If the label includes the pointing position, the leader line can be marked decorative.
For example:

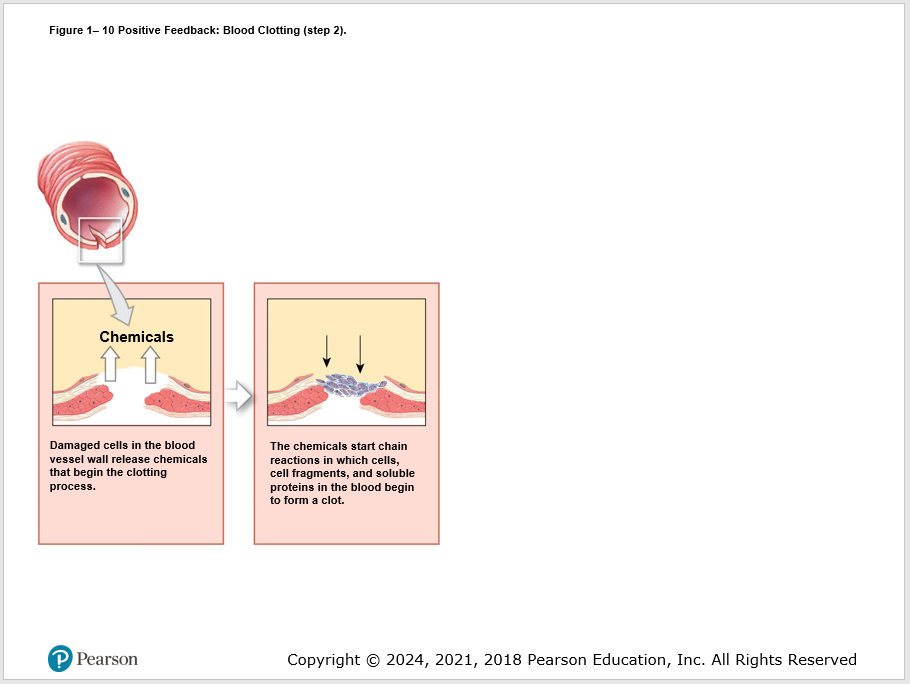
- Avoid too much content on a slide, you may need to break up content into multiple slides.
- Not all content is suitable for a PPT slide due to the real estate size of the slide. If you are having a difficult time “fitting” it on the slide, you may want to consider using a different design approach to display the content.
- Avoid grouped images. Group images create a lot of extra noise on the slide for screen reader users. Make grouped images into one image by taking a screenshot of the grouped image and save it as a new image.
Example:
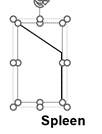
The leader line was created with 2 separate lines. Even when items are grouped, they still create extra noise for screen reader users.
Added 2.27.23